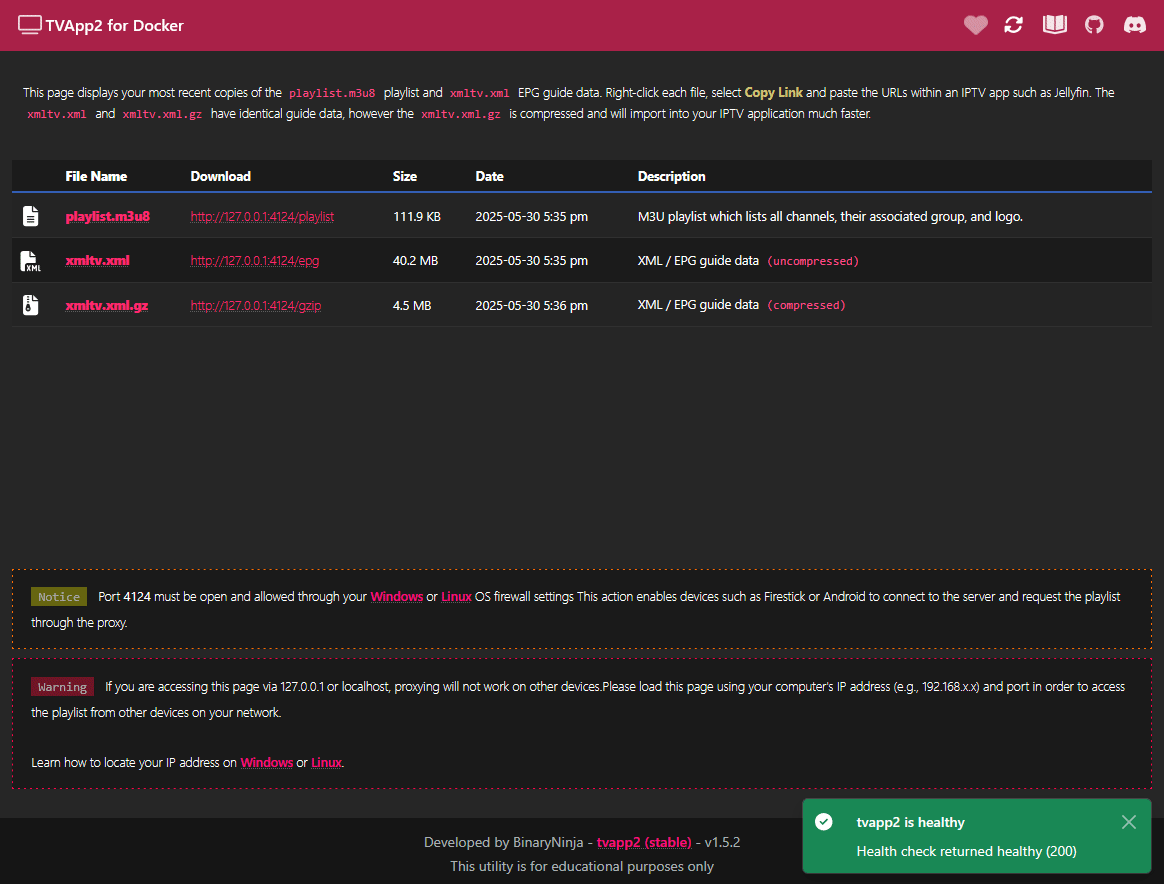
/usr/bin/app/www/xmltv.xml
```
---
## Traefik Integration
> [!NOTE]
> These steps are **optional**.
>
> If you do not use Traefik, you can skip this section of steps. This is only for users who wish to put the TVApp2 container behind Traefik.
Our first step is to tell Traefik about our TVApp2 container. We highly recommend you utilize a Traefik [📄 dynamic file](#dynamicyml), instead of **[labels](#labels)**. Using a [📄 dynamic file](#dynamicyml) allows for automatic refreshing without the need to restart Traefik when a change is made.
If you decide to use **[labels](#labels)** instead of a [📄 dynamic file](#dynamicyml), any changes you want to make to your labels will require a restart of Traefik.
We will be setting up the following:
- A `middleware` to re-direct http to https
- A `route` to access TVApp2 via http (optional)
- A `route` to access TVApp2 via https (secure)
- A `service` to tell Traefik how to access your TVApp2 container
- A `resolver` so that Traefik can generate and apply a wildcard SSL certificate
### Labels
To add TVApp2 to Traefik, you will need to open your `📄 docker-compose.yml` and apply the following labels to your TVApp2 container. Ensure you change `domain.lan` to your actual domain name.
```yml
services:
tvapp2:
container_name: tvapp2
image: ghcr.io/thebinaryninja/tvapp2:latest # Image: Github
# image: thebinaryninja/tvapp2:latest # Image: Dockerhub
# image: git.binaryninja.net/binaryninja/tvapp2:latest # Image: Gitea
hostname: tvapp2
restart: unless-stopped
volumes:
- /etc/timezone:/etc/timezone:ro
- /etc/localtime:/etc/localtime:ro
- /var/run/docker.sock:/var/run/docker.sock
- ./config:/config
- ./app:/usr/bin/app
environment:
- TZ=Etc/UTC
- DIR_RUN=/usr/bin/app
labels:
# General
- traefik.enable=true
# Router > http
- traefik.http.routers.tvapp2-http.rule=Host(`tvapp2.localhost`) || Host(`tvapp2.domain.lan`)
- traefik.http.routers.tvapp2-http.service=tvapp2
- traefik.http.routers.tvapp2-http.entrypoints=http
- traefik.http.routers.tvapp2-http.middlewares=https-redirect@file
# Router > https
- traefik.http.routers.tvapp2-https.rule=Host(`tvapp2.localhost`) || Host(`tvapp2.domain.lan`)
- traefik.http.routers.tvapp2-https.service=tvapp2
- traefik.http.routers.tvapp2-https.entrypoints=https
- traefik.http.routers.tvapp2-https.tls=true
- traefik.http.routers.tvapp2-https.tls.certresolver=cloudflare
- traefik.http.routers.tvapp2-https.tls.domains[0].main=domain.lan
- traefik.http.routers.tvapp2-https.tls.domains[0].sans=*.domain.lan
# Load Balancer
- traefik.http.services.tvapp2.loadbalancer.server.port=4124
- traefik.http.services.tvapp2.loadbalancer.server.scheme=http
```
After you've added the labels above, skip the [📄 dynamic.yml](#dynamicyml) section and go straight to the **[📄 static.yml](#staticyml)** section.
### Dynamic.yml
If you decide to not use **[labels](#labels)** and want to use a [📄 dynamic file](#dynamicyml), you will first need to create your [📄 dynamic file](#dynamicyml). the Traefik [📄 dynamic file](#dynamicyml) is usually named `📄 dynamic.yml`. We need to add a new `middleware`, `router`, and `service` to our Traefik [📄 dynamic file](#dynamicyml) so that it knows about our new TVApp2 container and where it is.
```yml
http:
middlewares:
https-redirect:
redirectScheme:
scheme: "https"
permanent: true
routers:
tvapp2-http:
service: tvapp2
rule: Host(`tvapp2.localhost`) || Host(`tvapp2.domain.lan`)
entryPoints:
- http
middlewares:
- https-redirect@file
tvapp2-https:
service: tvapp2
rule: Host(`tvapp2.localhost`) || Host(`tvapp2.domain.lan`)
entryPoints:
- https
tls:
certResolver: cloudflare
domains:
- main: "domain.lan"
sans:
- "*.domain.lan"
services:
tvapp2:
loadBalancer:
servers:
- url: "https://tvapp2:4124"
```
### Static.yml
These entries will go in your Traefik `📄 static.yml` file. Any changes made to this file requires that you restart Traefik afterward.
#### Providers
> [!NOTE]
> This step is only for users who opted to use the **[📄 dynamic file](#dynamicyml)** method.
>
> Users who opted to use [labels](#labels) can skip to the section **[certificatesResolvers](#certificatesresolvers)**
Ensure you add the following new section to your `📄 static.yml`:
```yml
providers:
docker:
endpoint: "unix:///var/run/docker.sock"
exposedByDefault: false
network: traefik
watch: true
file:
filename: "/etc/traefik/dynamic.yml"
watch: true
```
The code above is what enables the use of a **[📄 dynamic file](#dynamicyml)** instead of labels. Change `📄 /etc/traefik/dynamic.yml` if you are placing your dynamic file in a different location. This path is relative to inside the container, not your host machine mounted volume path. Traefik keeps most files in the `📁 /etc/traefik/` folder.
After you add the above, open your Traefik's `📄 docker-compose.yml` file and mount a new volume so that Traefik knows where your new dynamic file is:
```yml
services:
traefik:
container_name: traefik
image: traefik:latest
hostname: tvapp2
restart: unless-stopped
volumes:
- /var/run/docker.sock:/var/run/docker.sock:ro
- /etc/localtime:/etc/localtime:ro
- ./config/traefik.yml:/etc/traefik/traefik.yml:ro
- ./config/dynamic.yml:/etc/traefik/dynamic.yml:ro
```
You must ensure you add a new volume like shown above:
- `/config/dynamic.yml:/etc/traefik/dynamic.yml:ro`
On your host machine, make sure you place the `📄 dynamic.yml` file in a sub-folder called **config**, which should be inside the same folder where your Traefik's `📄 docker-compose.yml` file is. If you want to change this location, ensure you change the mounted volume path above.
After you have completed this, proceed to the section **[certificatesResolvers](#certificatesresolvers)**.
#### certificatesResolvers
> [!NOTE]
> This step is required no matter which option you picked above, both for **[📄 dynamic file](#dynamicyml)** setups, as well as people using **[labels](#labels)**.
Open your Traefik `📄 static.yml` file. We need to define the `certResolver` that we added above either in your dynamic file, or label. To define the `certResolver`, we will be adding a new section labeled `certificatesResolvers`. We are going to use Cloudflare in this example, you can use whatever from the list at:
- https://doc.traefik.io/traefik/https/acme/#providers
```yml
certificatesResolvers:
cloudflare:
acme:
email: youremail@address.com
storage: /cloudflare/acme.json
keyType: EC256
preferredChain: 'ISRG Root X1'
dnsChallenge:
provider: cloudflare
delayBeforeCheck: 15
resolvers:
- "1.1.1.1:53"
- "1.0.0.1:53"
disablePropagationCheck: true
```
Once you pick the DNS / SSL provider you want to use from the code above, you need to see if that provider has any special environment variables that must be set. The **[Providers Page](https://doc.traefik.io/traefik/https/acme/#providers)** lists all providers and also what env variables need set for each one.
In our example, since we are using **Cloudflare** for `dnsChallenge` -> `provider`, we must set the following environment variables:
- `CF_API_EMAIL`
- `CF_API_KEY`
Create a `.env` environment file in the same folder where your Traefik `📄 docker-compose.yml` file is located, and add the following:
```yml
CF_API_EMAIL=yourcloudflare@email.com
CF_API_KEY=Your-Cloudflare-API-Key
```
Save the `📄 .env` file and exit. For these environment variables to be detected by Traefik, you must give your Traefik container a restart. Until you restart Traefik, it will not be able to generate your new SSL certificates. Before doing the restart, we need to create one more folder and file; this is where Traefik will store your SSL certificate generated by Cloudflare.
Run the commands below, which will do the following:
- Create a new folder called `cloudflare`
- Create a new file named `📄 acme.json`
- Set the permission for the `📄 acme.json` file to `chmod 600`.
- If you do not do this step, Traefik will fail to start. You must change the permissions in order to protect the file.
```shell
mkdir -p /home/docker/traefik/cloudflare
touch /home/docker/traefik/cloudflare/acme.json
chmod 0600 /home/docker/traefik/cloudflare/acme.json
```
The `📄 acme.json` file will not be populated with an SSL certificate until the next time you restart Traefik. You can wait and restart in a moment after you finish editing the `📄 static.yml` file, as there are more items to add below.
#### entryPoints (Normal)
Finally, inside the Traefik `📄 static.yml`, we need to make sure we have our `entryPoints` configured. Add the following to the Traefik `📄 static.yml` file only if you **DON'T** have entry points set yet:
```yml
entryPoints:
http:
address: :80
http:
redirections:
entryPoint:
to: https
scheme: https
https:
address: :443
http3: {}
http:
tls:
options: default
certResolver: cloudflare
domains:
- main: domain.lan
sans:
- '*.domain.lan'
```
#### entryPoints (Cloudflare)
If your website is behind Cloudflare's proxy service, you need to modify your `entryPoints` above so that you can automatically allow Cloudflare's IP addresses through. This means your entry points will look a bit different.
In the example below, we will add `forwardedHeaders` -> `trustedIPs` and add all of Cloudflare's IPs to the list which are available here:
- https://cloudflare.com/ips/
```yml
entryPoints:
http:
address: :80
forwardedHeaders:
trustedIPs: &trustedIps
- 103.21.244.0/22
- 103.22.200.0/22
- 103.31.4.0/22
- 104.16.0.0/13
- 104.24.0.0/14
- 108.162.192.0/18
- 131.0.72.0/22
- 141.101.64.0/18
- 162.158.0.0/15
- 172.64.0.0/13
- 173.245.48.0/20
- 188.114.96.0/20
- 190.93.240.0/20
- 197.234.240.0/22
- 198.41.128.0/17
- 2400:cb00::/32
- 2606:4700::/32
- 2803:f800::/32
- 2405:b500::/32
- 2405:8100::/32
- 2a06:98c0::/29
- 2c0f:f248::/32
http:
redirections:
entryPoint:
to: https
scheme: https
https:
address: :443
http3: {}
forwardedHeaders:
trustedIPs: *trustedIps
http:
tls:
options: default
certResolver: cloudflare
domains:
- main: domain.lan
sans:
- '*.domain.lan'
```
Remember to change `domain.lan` to your actual domain name. Then save the files and then give Traefik and your TVApp2 container a restart. After the restart is complete; you should be able to access TVApp2 in your browser by going to
```console
https://tvapp2.domain.lan
```
---
## Authentik Integration
This section will not explain how to install and set up [Authentik](https://goauthentik.io/). We are only going to cover adding TVApp2 integration to Authentik.
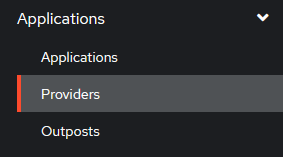
Sign into the Authentik admin panel, go to the left-side navigation, select **Applications** -> **Providers**. Then at the top of the new page, click **Create**.
Authentik: Select Applications › Providers

Authentik: Select Create
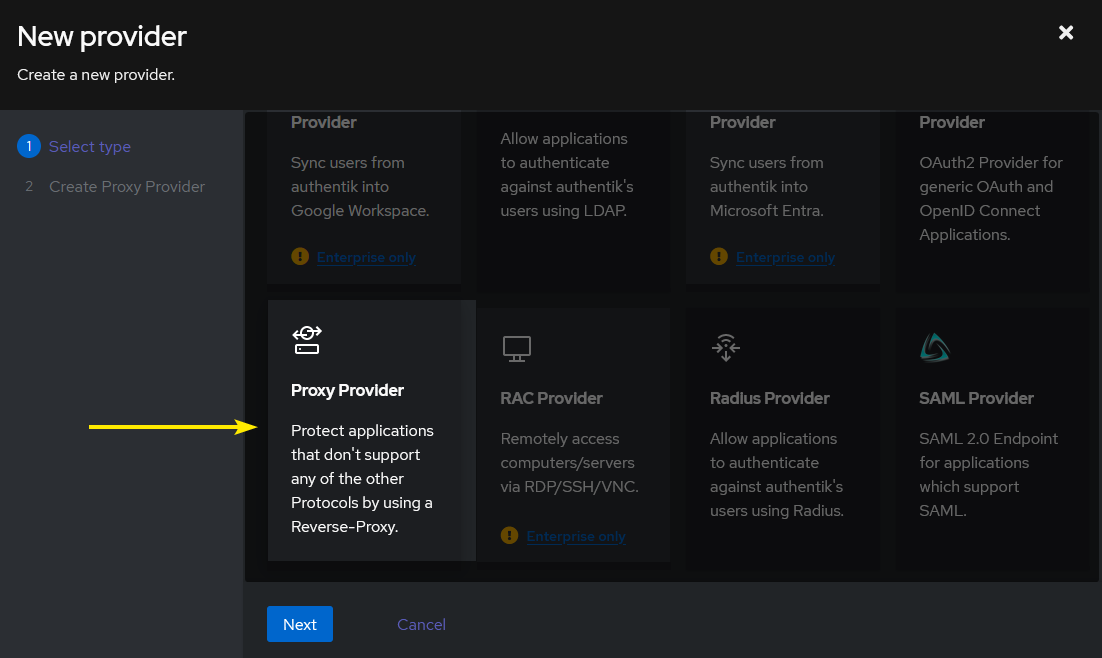
For the **provider**, select `Proxy Provider`.
Authentik: Select desired provider type, or select Proxy Provider
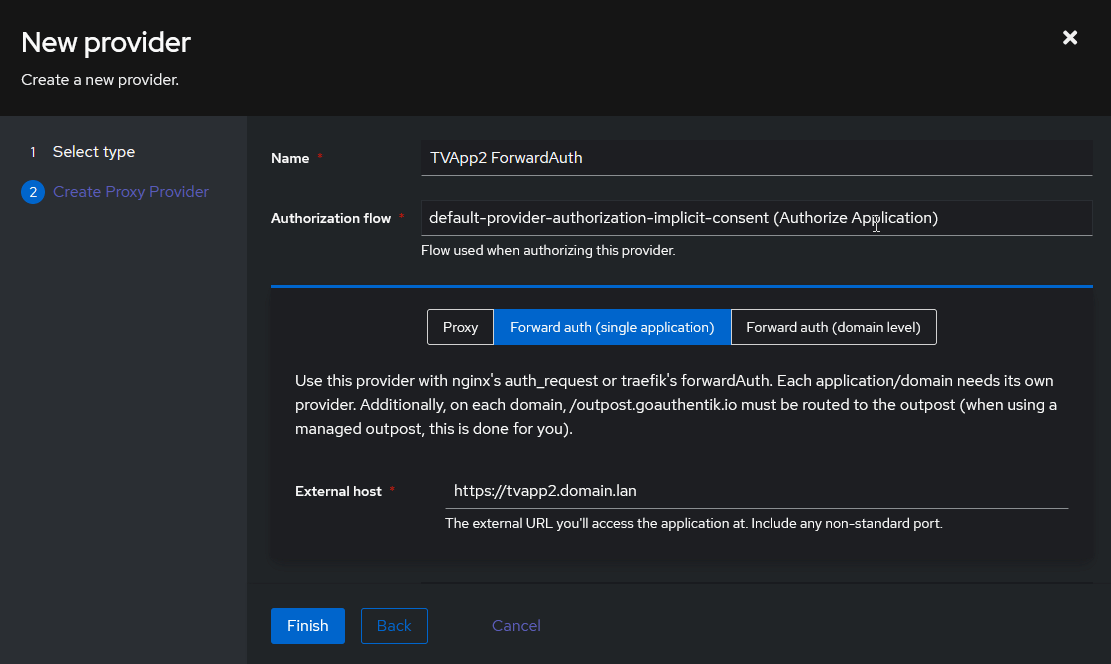
Add the following provider values:
- **Name**: `TVApp2 ForwardAuth`
- **Authentication Flow**: `default-source-authentication (Welcome to authentik!)`
- **Authorization Flow**: `default-provider-authorization-implicit-consent (Authorize Application)`
Select **Forward Auth (single application)**:
- **External Host**: `https://tvapp2.domain.lan`
Authentik: Create new Provider
Once finished, click **Create**. Then on the left-side menu, select **Applications** -> **Applications**. Then at the top of the new page, click **Create**.
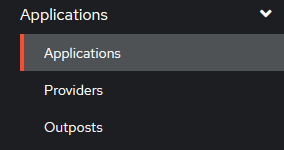
Authentik: Select Applications › Applications
Authentik: Select Create
Add the following parameters:
- **Name**: `TVApp2 IPTV`
- **Slug**: `tvapp2`
- **Group**: `IPTV`
- **Provider**: `TVApp2 ForwardAuth`
- **Backchannel Providers**: `None`
- **Policy Engine Mode**: `any`
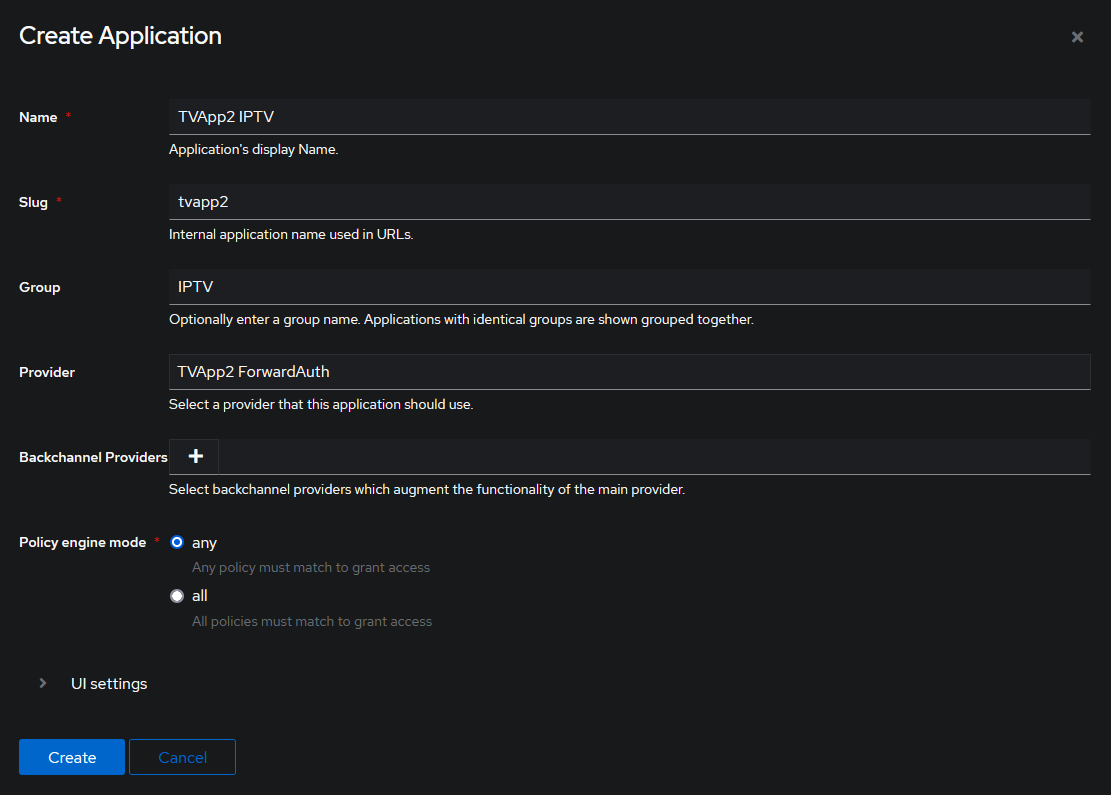
Authentik: Create Application
Save, and then on the left-side menu, select **Applications** -> **Outposts**:
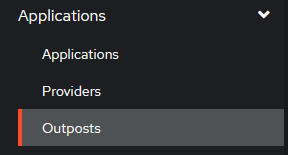
Authentik: Select Applications › Outposts
Find your **Outpost** and edit it.
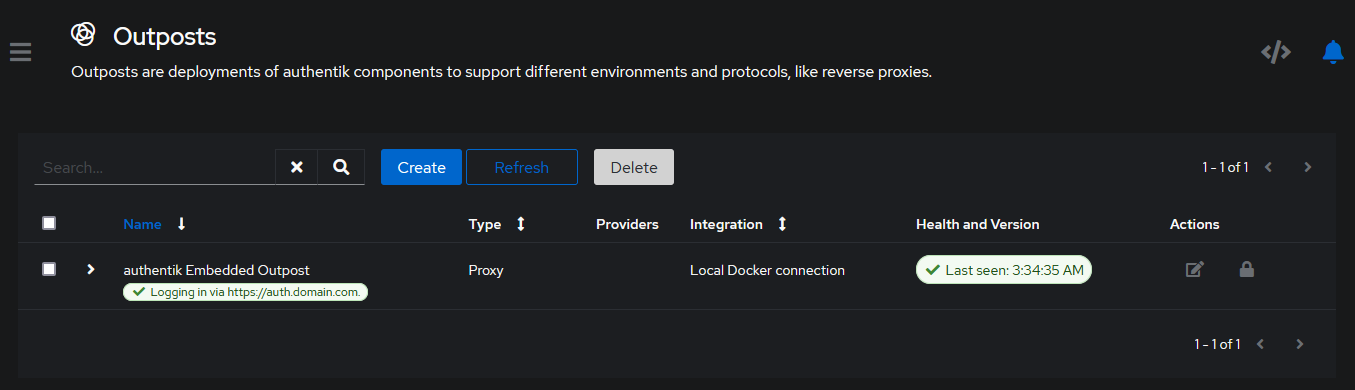
Authentik: Edit outpost
Move `TVApp2 IPTV` to the right side **Selected Applications** box.
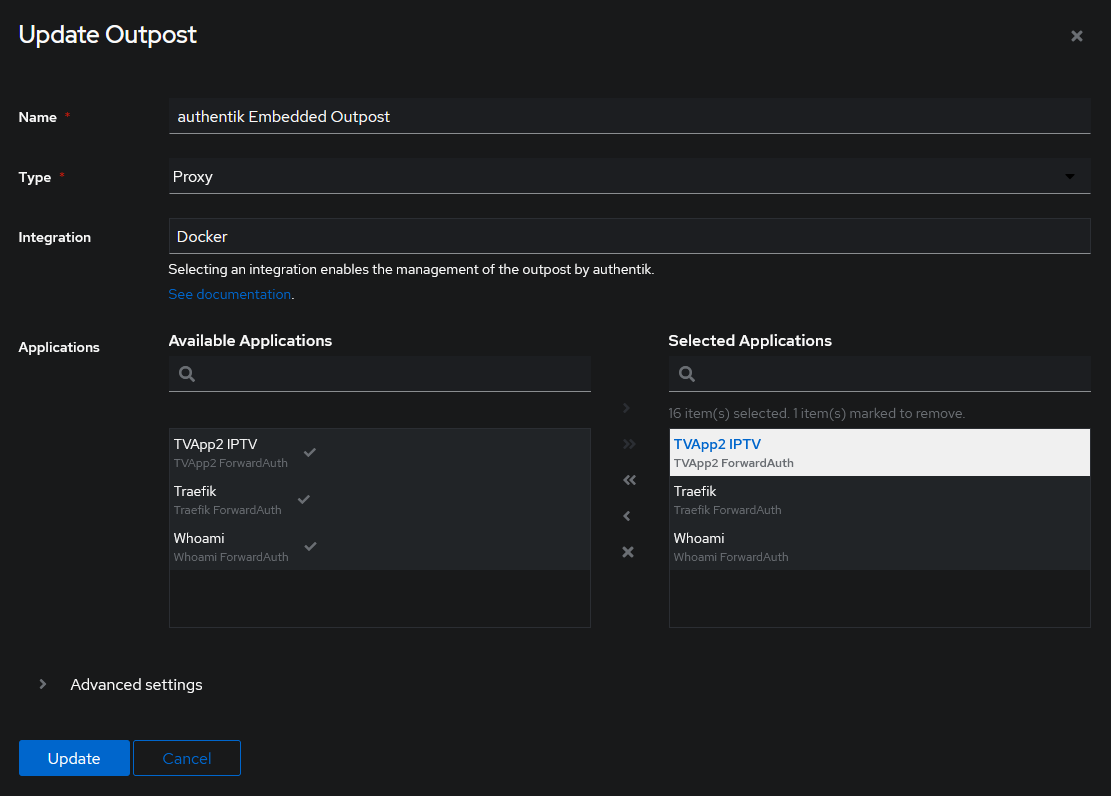
Authentik: Assign application to outpost
If you followed our [Traefik](#traefik-integration) guide above, you were shown how to add your TVApp2 container to Traefik using either the [📄 dynamic file](#dynamicyml) or **[labels](#labels)**. Depending on which option you picked, follow that section's guide below.
- For **label** users, go to the section [Labels](#labels-1) below.
- For **dynamic file** users, go to the section [📄 dynamic file](#dynamicyml-1) below.
### Labels
Open your TVApp2's `📄 docker-compose.yml` and modify your labels to include Authentik as a **middleware** by adding `authentik@file` to the label `traefik.http.routers.tvapp2-https.middlewares`. You should have something similar to the example below:
```yml
services:
tvapp2:
container_name: tvapp2
image: ghcr.io/thebinaryninja/tvapp2:latest # Image: Github
# image: thebinaryninja/tvapp2:latest # Image: Dockerhub
# image: git.binaryninja.net/binaryninja/tvapp2:latest # Image: Gitea
restart: unless-stopped
volumes:
- /etc/timezone:/etc/timezone:ro
- /etc/localtime:/etc/localtime:ro
- /var/run/docker.sock:/var/run/docker.sock
- ./config:/config
- ./app:/usr/bin/app
environment:
- TZ=Etc/UTC
- DIR_RUN=/usr/bin/app
labels:
# General
- traefik.enable=true
# Router > http
- traefik.http.routers.tvapp2-http.rule=Host(`tvapp2.localhost`) || Host(`tvapp2.domain.lan`)
- traefik.http.routers.tvapp2-http.service=tvapp2
- traefik.http.routers.tvapp2-http.entrypoints=http
- traefik.http.routers.tvapp2-http.middlewares=https-redirect@file
# Router > https
- traefik.http.routers.tvapp2-https.rule=Host(`tvapp2.localhost`) || Host(`tvapp2.domain.lan`)
- traefik.http.routers.tvapp2-https.service=tvapp2
- traefik.http.routers.tvapp2-https.entrypoints=https
- traefik.http.routers.tvapp2-https.middlewares=authentik@file
- traefik.http.routers.tvapp2-https.tls=true
- traefik.http.routers.tvapp2-https.tls.certresolver=cloudflare
- traefik.http.routers.tvapp2-https.tls.domains[0].main=domain.lan
- traefik.http.routers.tvapp2-https.tls.domains[0].sans=*.domain.lan
# Load Balancer
- traefik.http.services.tvapp2.loadbalancer.server.port=443
- traefik.http.services.tvapp2.loadbalancer.server.scheme=https
```
### Dynamic.yml
If you opted to use the [📄 dynamic file](#dynamicyml), open your Traefik's `📄 dynamic.yml` file and apply the `authentik@file` middleware to look something like the following:
```yml
http:
routers:
tvapp2-https:
service: tvapp2
rule: Host(`tvapp2.localhost`) || Host(`tvapp2.domain.com`)
entryPoints:
- https
middlewares:
- authentik@file
tls:
certResolver: cloudflare
domains:
- main: "domain.com"
sans:
- "*.domain.com"
```
After you've done everything above, give your **Traefik** and **Authentik** containers a restart. Once they come back up; you should be able to access `tvapp2.domain.lan` and be prompted now to authenticate with Authentik. Once you authenticate, you should be re-directed to your TVApp2 home screen which is where you will get your m3u and epg files.
---
## Troubleshooting
If you have issues building your TVApp2 docker image, please refer to the following sections below:
#### Run Error: `Error serving playlist: ENOENT: no such file or directory, open /usr/src/app/xmltv.1.xml`
This error occurs at run-time when attempting to spin up your TVApp2 docker container. If you receive this error, restart your TVApp2 docker container. Ensure that your docker container also has access to your docker network so that it can connect to our repository and fetch the data files it needs to generate your playlist.
If the error continues after doing the above; delete the existing image, and re-pull from one of our official sources.
#### Build Error: `s6-rc-compile: fatal: invalid /etc/s6-overlay/s6-rc.d/certsync/type: must be oneshot, longrun, or bundle`
This error means that you are attempting to combine files which are utilizing CRLF over LF; which is **CR** = Carriage Return and **LF** = Line Feed
The **CRLF** line break type is commonly used in Windows operating systems and DOS-based text files. It combines two characters: Carriage Return (CR) and Line Feed (LF).
The **LF** line break type is predominantly used in Unix, Linux, macOS, and modern text editors, including those for web development. In this convention, a single Line Feed character `\n` represents a line break. Unlike CR LF, there is no preceding Carriage Return character. The LF line break type solely relies on the line feed character to move to the next line.
If you attempt to build the TVApp2 docker image in Linux, but have modified the files in Windows, you may receive the following error:
```console
s6-rc-compile: fatal: invalid /etc/s6-overlay/s6-rc.d/certsync/type: must be oneshot, longrun, or bundle
```
To correct this issue, `🗔 cd` into the folder with the TVApp2 files, and then convert them to `LF` using the library `🗔 dos2unix`. The command below will convert all files to LF, but will EXCLUDE the following:
- `.git` folder
- `.jpg` images
- `.jpeg` images
- `.png` images
```shell
cd /path/to/tvapp2
find ./ -type f | grep -Ev '.git|*.jpg|*.jpeg|*.png' | sudo xargs dos2unix --
```
> [!WARNING]
> Do not run `🗔 dos2unix` on your `📁 .git` folder or you will corrupt your git indexes and will be unable to push commits.
>
> If you accidentally run `🗔 dos2unix` on your .git folder, do NOT push anything to git. Pull a new copy from the repo.
#### Build Error: `unable to exec /etc/s6-overlay/s6-rc.d/init-envfile/run: Permission denied`
There are multiple errors you can receive when attempting to run your TVApp2 docker image. You may receive any of the following errors:
- `Failed to open apk database: Permission denied`
- `s6-rc: warning: unable to start service init-adduser: command exited 127`
- `unable to exec /etc/s6-overlay/s6-rc.d/init-envfile/run: Permission denied`
- `/etc/s6-overlay/s6-rc.d/init-adduser/run: line 34: aetherxown: command not found`
- `/etc/s6-overlay/s6-rc.d/init-adduser/run: /usr/bin/aetherxown: cannot execute: required file not found`
If you receive any of the above errors; this means that you have not set your `run` files to have execute permissions `+x`. Run the following command in the root directory of your TVApp2 project folder:
```shell
find ./ -name 'run' -exec sudo chmod +x {} \;
```
After you have set these permissions, re-build your docker image using `docker build` or `docker buildx`. Then spin the container up.
#### Build Error: `[ERR] [27] Jellyfin.LiveTv.Guide.GuideManager: Error getting programs for channel XXXXXXXXXXXXXXX (Source 2) System.Xml.XmlException: '�', hexadecimal value 0x1F, is an invalid character. Line 1, position 1.`
This error may be seen if you are attempting to import our EPG guide data directly into Jellyfin. The cause of this is due to you having **GZIP Compression** enabled in your header request and response. See the example below; which is in your TVApp2 `📄 docker-compose.yml` file:
```yml
tvapp2:
container_name: tvapp2
image: ghcr.io/thebinaryninja/tvapp2:latest
hostname: tvapp2
restart: unless-stopped
environment:
LOG_LEVEL: 10
WEB_ENCODING: 'gzip, deflate, br'
```
To fix the issue, add or change the environment variable `WEB_ENCODING` and ensure `gzip` is not specified in the list like the following:
```yml
tvapp2:
container_name: tvapp2
image: ghcr.io/thebinaryninja/tvapp2:latest
hostname: tvapp2
restart: unless-stopped
environment:
LOG_LEVEL: 10
WEB_ENCODING: 'deflate, br'
```
---
## Extra Notes
The following are other things to take into consideration when creating the TVApp2 image:
### Accessing Container Shell
The TVApp2 docker image is built on Alpine Linux, but also includes the `📦 bash` package. Use one of the following to access the shell for this container:
#### ash
```shell
docker exec -it tvapp2 ash
```
#### sh
```shell
docker exec -it tvapp2 sh
```
#### bash
```shell
docker exec -it tvapp2 bash
```
### Custom Docker Image Scripts
> [!NOTE]
> These instructions are for **Advanced Users Only**; who wish to build their own image.
The [🔀 thebinaryninja/tvapp2](https://github.com/thebinaryninja/tvapp2) image supports the ability of adding custom scripts that will be ran when the container is started. To create / add a new custom script to the container, you need to create a new folder in the container source files `📁 /root` folder
```shell
mkdir -p /root/custom-cont-init.d/
```
Within this new folder, add your custom script:
```shell
nano /root/custom-cont-init.d/my_customs_script
```
Your new custom script should be populated with the bash code you want to perform actions with such as the example below:
```bash
#!/bin/bash
echo "**** INSTALLING BASH ****"
apk add --no-cache bash
```
When you create the docker image, this new script will automatically be loaded. You can also do this via the `📄 docker-compose.yml` file by mounting a new volume:
```yml
services:
tvapp2:
volumes:
- ./config:/config
- ./app:/usr/bin/app
- ./custom-scripts:/custom-cont-init.d:ro
```
> [!NOTE]
> if using compose, we recommend mounting them **read-only** (`:ro`) so that container processes cannot write to the location.
> [!WARNING]
> The folder `📂 /root/custom-cont-init.d` **MUST** be owned by `👥 root`. If this is not the case, this folder will be renamed and a new empty folder will be created. This is to prevent remote code execution by putting scripts in the aforesaid folder.
The [🔀 thebinaryninja/tvapp2](https://github.com/thebinaryninja/tvapp2) image already contains a custom script called `📄 /root/custom-cont-init.d/plugins`. Do **NOT** edit this script. It is what automatically downloads the official TVApp2 plugins and adds them to the container.
---
## 🏆 Dedication
This repository and this project serves in memory of the developer [dtankdempse](https://hub.docker.com/r/dtankdemp). His work lives on in this project, and while a lot of it has changed, it all started because of him.
---
## ✨ Contributors
We are always looking for contributors. If you feel that you can provide something useful to Gistr, then we'd love to review your suggestion. Before submitting your contribution, please review the following resources:
- [Pull Request Procedure](.github/PULL_REQUEST_TEMPLATE.md)
- [Contributor Policy](CONTRIBUTING.md)
Want to help but can't write code?
- Review [active questions by our community](https://github.com/TheBinaryNinja/tvapp2/labels/help%20wanted) and answer the ones you know.

The following people have helped get this project going:
[![Contributors][contribs-all-img]](#contributors-)
[general-npmjs-uri]: https://npmjs.com
[general-nodejs-uri]: https://nodejs.org
[general-npmtrends-uri]: http://npmtrends.com/csf-firewall
[github-version-img]: https://img.shields.io/github/v/tag/TheBinaryNinja/tvapp2?logo=GitHub&label=Version&color=ba5225
[github-version-uri]: https://github.com/TheBinaryNinja/tvapp2/releases
[license-mit-img]: https://img.shields.io/badge/MIT-FFF?logo=creativecommons&logoColor=FFFFFF&label=License&color=9d29a0
[license-mit-uri]: https://github.com/TheBinaryNinja/tvapp2/blob/main/LICENSE
[github-downloads-img]: https://img.shields.io/github/downloads/TheBinaryNinja/tvapp2/total?logo=github&logoColor=FFFFFF&label=Downloads&color=376892
[github-downloads-uri]: https://github.com/TheBinaryNinja/tvapp2/releases
[github-size-img]: https://img.shields.io/github/repo-size/TheBinaryNinja/tvapp2?logo=github&label=Size&color=59702a
[github-size-uri]: https://github.com/TheBinaryNinja/tvapp2/releases
[contribs-all-img]: https://img.shields.io/github/all-contributors/TheBinaryNinja/tvapp2?logo=contributorcovenant&color=de1f6f&label=contributors
[contribs-all-uri]: https://github.com/all-contributors/all-contributors
[github-build-img]: https://img.shields.io/github/actions/workflow/status/TheBinaryNinja/tvapp2/npm-release.yml?logo=github&logoColor=FFFFFF&label=Build&color=%23278b30
[github-build-uri]: https://github.com/TheBinaryNinja/tvapp2/actions/workflows/npm-release.yml
[github-build-pypi-img]: https://img.shields.io/github/actions/workflow/status/TheBinaryNinja/tvapp2/release-pypi.yml?logo=github&logoColor=FFFFFF&label=Build&color=%23278b30
[github-build-pypi-uri]: https://github.com/TheBinaryNinja/tvapp2/actions/workflows/pypi-release.yml
[github-tests-img]: https://img.shields.io/github/actions/workflow/status/TheBinaryNinja/tvapp2/npm-tests.yml?logo=github&label=Tests&color=2c6488
[github-tests-uri]: https://github.com/TheBinaryNinja/tvapp2/actions/workflows/npm-tests.yml
[github-commit-img]: https://img.shields.io/github/last-commit/TheBinaryNinja/tvapp2?logo=conventionalcommits&logoColor=FFFFFF&label=Last%20Commit&color=313131
[github-commit-uri]: https://github.com/TheBinaryNinja/tvapp2/commits/main/
[github-docker-version-img]: https://badges-ghcr.onrender.com/thebinaryninja/tvapp2/latest_tag?color=%233d9e18&ignore=development-amd64%2Cdevelopment%2Cdevelopment-arm64%2Clatest&label=version&trim=
[github-docker-version-uri]: https://github.com/TheBinaryNinja/tvapp2/pkgs/container/tvapp2
[dockerhub-docker-version-img]: https://img.shields.io/docker/v/thebinaryninja/tvapp2?sort=semver&arch=arm64
[dockerhub-docker-version-uri]: https://hub.docker.com/repository/docker/thebinaryninja/tvapp2/general
[gitea-docker-version-img]: https://badges-ghcr.onrender.com/thebinaryninja/tvapp2/latest_tag?color=%233d9e18&ignore=latest&label=version&trim=
[gitea-docker-version-uri]: https://git.binaryninja.net/BinaryNinja/tvapp2
[gitea2-docker-version-img]: https://img.shields.io/gitea/v/release/binaryninja/tvapp2?gitea_url=https%3A%2F%2Fgit.binaryninja.net
[gitea2-docker-version-uri]: https://git.binaryninja.net/BinaryNinja/-/packages/container/tvapp2/latest
[btn-github-submit-img]: https://img.shields.io/badge/submit%20new%20issue-de1f5c?style=for-the-badge&logo=github&logoColor=FFFFFF
[btn-github-submit-uri]: https://github.com/TheBinaryNinja/tvapp2/issues